Scalar
(→Basics Scalar Functions) |
(→Setting Up a Scalar Book) |
||
| (24 intermediate revisions by 2 users not shown) | |||
| Line 1: | Line 1: | ||
| − | = | + | For more information on editing your Scalar book, refer to the Scalar Template Book at http://scalar.usc.edu/hc/templates/index |
| + | =Setting Up a Scalar Book= | ||
[[Image:Manage_content_options.jpg|thumb|Managing Content Options]] | [[Image:Manage_content_options.jpg|thumb|Managing Content Options]] | ||
| Line 6: | Line 7: | ||
==Edit Book Title, Subtitle, and URL== | ==Edit Book Title, Subtitle, and URL== | ||
| − | Click "Manage Content" > Click "Book properties" tab > Edit "Title, | + | Click "Manage Content" > Click "Book properties" tab > Edit "Title", "Subtitle", and "URI Segment" fields > "SAVE" |
| + | |||
| + | ==Add, Remove, or Change Authors and Editors== | ||
| + | '''Add authors that can edit the book:''' | ||
| + | Click "Manage Content" > Click "Book users" tab > Click "Add a user" button > Type in the FULL name (First Last) of a registered Scalar user > Click "Search" > Click on their name once it appears. | ||
| + | |||
| + | '''Display an author's name on the book:''' | ||
| + | Once the author is added click the "Edit" button next to their name > Change the "In index" drop-box to "Yes" > "SAVE" | ||
| + | |||
| + | '''Change the order authorship displayed on the book''' | ||
| + | Click "Edit" next to all the author names that are displayed > Change the values under "Order" of each author to the order in which you want them to appear > "SAVE" | ||
==Edit Book Design/Style== | ==Edit Book Design/Style== | ||
===General Theme=== | ===General Theme=== | ||
| − | Click "Manage Content" > Click "Book properties" tab > Under "Style | + | Click "Manage Content" > Click "Book properties" tab > Under "Style", select a theme with the drop-box > "SAVE". Check style by going "back to book." |
===Background Image=== | ===Background Image=== | ||
| Line 18: | Line 29: | ||
'''Once uploaded, set background image:''' | '''Once uploaded, set background image:''' | ||
| − | Click "Manage Content" > Click "Book properties" tab > Under "Style | + | Click "Manage Content" > Click "Book properties" tab > Under "Style", select your background image using the "Background image" drop-box > "SAVE" |
===Further Edit Style Using CSS=== | ===Further Edit Style Using CSS=== | ||
| − | Refer to | + | Refer to Scalar Template Book at http://scalar.usc.edu/hc/templates/other-html for instructions on how to add CSS code to your book. |
| + | |||
| + | ==Adding a Timeline to Your Scalar Book== | ||
| + | [[Image:timelineJS.jpg|thumb|Interactive Timeline]] | ||
| + | Refer to the guide at TimelineJS http://timeline.verite.co/ to create interactive timelines that may help your audience better visualize your content. | ||
| + | |||
| + | |||
| + | |||
| + | |||
| + | |||
| + | |||
| + | ==Making your Scalar Book Public== | ||
| + | Your Scalar book can only be viewed by its authors until it is made public. | ||
| + | Click "Manage Content > Under "Other", change "Make URL public?" to "Yes" > "SAVE" | ||
=Importing Media= | =Importing Media= | ||
| Line 27: | Line 51: | ||
[[Image:scalar_main.jpg|thumb|Scalar main page]] | [[Image:scalar_main.jpg|thumb|Scalar main page]] | ||
| − | + | To begin importing media into Scalar, click on the "Manage Content" link on the upper right corner of the webpage. This will take your "Dashboard." Once inside your Dashboard, click on the "Media" tab. Under this tab you will be able to select from a variety of different media to be imported. | |
| + | |||
| + | |||
| + | |||
| + | |||
| + | |||
| + | |||
==HyperCities Importer== | ==HyperCities Importer== | ||
[[Image:Hypercities_importer.jpg|thumb|HyperCities Importer Interface]] | [[Image:Hypercities_importer.jpg|thumb|HyperCities Importer Interface]] | ||
| − | + | ||
| + | To import a HyperCities collection, first identify the unique code associated with that collection within HyperCities. This should be a series of 5 numbers. Next, you will be able to choose to import the HyperCities collection in the following four ways: | ||
| + | |||
| + | # Original HyperCities collection, with default sidebar | ||
| + | # HyperCities collection, with a sidebar of custom width. Set "width=0" for a collection without a sidebar. | ||
| + | # A specific object within a HyperCities collection. | ||
| + | # A specific object within a HyperCities collection, with a sidebar of custom width. Set "width=0" for a collection without a sidebar. | ||
| + | |||
| + | *IMPORTANT: the import may not work correctly import if the collection URL is copied directly from HyperCities. It is most reliable to enter the unique collection ID into the links that are provided on the HyperCities Import webpage. | ||
| + | |||
==Youtube Importer== | ==Youtube Importer== | ||
[[Image:youtube_importer.jpg|thumb|Youtube Importer Interface]] | [[Image:youtube_importer.jpg|thumb|Youtube Importer Interface]] | ||
| − | + | ||
| + | To import a Youtube video, simply type in the title of the Youtube video you are interested in and search for it. Once you have identified the video you would like to import, select the check box next to the thumbnail and select "import selected media" on the bottom right. You may also preview the video to ensure it is indeed the correct video prior to importing. | ||
| + | |||
| + | |||
| + | |||
==Import/Upload File from Hard Drive== | ==Import/Upload File from Hard Drive== | ||
[[Image:import_media.jpg|thumb|Media Importer Interface]] | [[Image:import_media.jpg|thumb|Media Importer Interface]] | ||
| − | + | ||
| + | To import a file from your hard drive, simply give it a Title and Description and locate the file on your hard drive. We recommend that you import your files to "/media". Also, we recommend that you create the URL from the title as opposed to the filename, as this usually results in a neater, and more logical URL. | ||
| + | |||
| + | *IMPORTANT: the import media page has a list of compatible file formats that are supported by various browsers and devices. Please pay attention to these when importing your media files to ensure that they will load properly. | ||
| + | |||
| + | |||
| + | |||
==Import File via Internet URL== | ==Import File via Internet URL== | ||
[[Image:import_url.jpg|thumb|Import via URL Interface]] | [[Image:import_url.jpg|thumb|Import via URL Interface]] | ||
| − | |||
| − | + | To import a file from another place on the internet, via the file's URL, simply give the file a Title and Description and paste in the URL of the file to be imported. | |
| − | + | ||
| − | + | *IMPORTANT: be sure that the URL you are inputting directly links to the file itself, and not for the entire webpage that the file is found, as this webpage will contain many other elements that you may not want to import. | |
| − | + | ||
=Working With Paths= | =Working With Paths= | ||
| − | + | [[Image:paths_edit.jpg|thumb|Select "Edit"]] | |
| + | |||
| + | |||
| + | * To create a path withing your book, first open the book you are interested in working on and click on the "Edit" button on the very bottom | ||
| + | |||
| + | * Within the edit page select "to make this page a path, specify items that it contains" | ||
| + | |||
| + | * You will be taken to a list of all the content in your current book. Select the content you wish to be in the path and click "add selected" at the bottom right corner once you are satisfied with your selection. You may also filter the contents of your selections by category at the top of the list. | ||
| + | |||
| + | * You may now reorder the items in your Path by simply dragging them in place. | ||
| + | |||
| + | [[Image:paths_make2.jpg|thumb|Make your page a Path]] | ||
| + | |||
| + | [[Image:paths_select2.jpg|thumb|Select items for your Path]] | ||
| + | |||
| + | [[Image:paths_order2.jpg|thumb|Reorder your items in a Path]] | ||
Latest revision as of 03:51, 15 July 2013
For more information on editing your Scalar book, refer to the Scalar Template Book at http://scalar.usc.edu/hc/templates/index
Contents |
Setting Up a Scalar Book
Creating a New Scalar Book
Click "Manage Content" > Click "My account" tab > Insert Book Title > Click "Create"
Edit Book Title, Subtitle, and URL
Click "Manage Content" > Click "Book properties" tab > Edit "Title", "Subtitle", and "URI Segment" fields > "SAVE"
Add, Remove, or Change Authors and Editors
Add authors that can edit the book: Click "Manage Content" > Click "Book users" tab > Click "Add a user" button > Type in the FULL name (First Last) of a registered Scalar user > Click "Search" > Click on their name once it appears.
Display an author's name on the book: Once the author is added click the "Edit" button next to their name > Change the "In index" drop-box to "Yes" > "SAVE"
Change the order authorship displayed on the book Click "Edit" next to all the author names that are displayed > Change the values under "Order" of each author to the order in which you want them to appear > "SAVE"
Edit Book Design/Style
General Theme
Click "Manage Content" > Click "Book properties" tab > Under "Style", select a theme with the drop-box > "SAVE". Check style by going "back to book."
Background Image
Upload your background image: Click "Manage Content" > Click "Media" tab > Click "Upload file" link > Create a Title for the background image (ie: background_image) > "Choose File" > "Upload"
Once uploaded, set background image: Click "Manage Content" > Click "Book properties" tab > Under "Style", select your background image using the "Background image" drop-box > "SAVE"
Further Edit Style Using CSS
Refer to Scalar Template Book at http://scalar.usc.edu/hc/templates/other-html for instructions on how to add CSS code to your book.
Adding a Timeline to Your Scalar Book
Refer to the guide at TimelineJS http://timeline.verite.co/ to create interactive timelines that may help your audience better visualize your content.
Making your Scalar Book Public
Your Scalar book can only be viewed by its authors until it is made public. Click "Manage Content > Under "Other", change "Make URL public?" to "Yes" > "SAVE"
Importing Media
To begin importing media into Scalar, click on the "Manage Content" link on the upper right corner of the webpage. This will take your "Dashboard." Once inside your Dashboard, click on the "Media" tab. Under this tab you will be able to select from a variety of different media to be imported.
HyperCities Importer
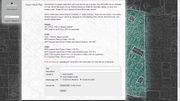
To import a HyperCities collection, first identify the unique code associated with that collection within HyperCities. This should be a series of 5 numbers. Next, you will be able to choose to import the HyperCities collection in the following four ways:
- Original HyperCities collection, with default sidebar
- HyperCities collection, with a sidebar of custom width. Set "width=0" for a collection without a sidebar.
- A specific object within a HyperCities collection.
- A specific object within a HyperCities collection, with a sidebar of custom width. Set "width=0" for a collection without a sidebar.
- IMPORTANT: the import may not work correctly import if the collection URL is copied directly from HyperCities. It is most reliable to enter the unique collection ID into the links that are provided on the HyperCities Import webpage.
Youtube Importer
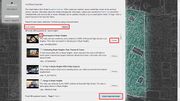
To import a Youtube video, simply type in the title of the Youtube video you are interested in and search for it. Once you have identified the video you would like to import, select the check box next to the thumbnail and select "import selected media" on the bottom right. You may also preview the video to ensure it is indeed the correct video prior to importing.
Import/Upload File from Hard Drive
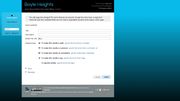
To import a file from your hard drive, simply give it a Title and Description and locate the file on your hard drive. We recommend that you import your files to "/media". Also, we recommend that you create the URL from the title as opposed to the filename, as this usually results in a neater, and more logical URL.
- IMPORTANT: the import media page has a list of compatible file formats that are supported by various browsers and devices. Please pay attention to these when importing your media files to ensure that they will load properly.
Import File via Internet URL
To import a file from another place on the internet, via the file's URL, simply give the file a Title and Description and paste in the URL of the file to be imported.
- IMPORTANT: be sure that the URL you are inputting directly links to the file itself, and not for the entire webpage that the file is found, as this webpage will contain many other elements that you may not want to import.
Working With Paths
- To create a path withing your book, first open the book you are interested in working on and click on the "Edit" button on the very bottom
- Within the edit page select "to make this page a path, specify items that it contains"
- You will be taken to a list of all the content in your current book. Select the content you wish to be in the path and click "add selected" at the bottom right corner once you are satisfied with your selection. You may also filter the contents of your selections by category at the top of the list.
- You may now reorder the items in your Path by simply dragging them in place.


